Welcome to @myone.bm, One's new email platform. You'll enjoy the benefits of expanded features and an increased inbox capacity.
Where can I access and log in to my email account?
A. Visit our website www.onecomm.bm and click Webmail at the top right of the home page.
Choose Go to webmail.myone.bm
Enter your Email address and Password then click Log in.
B. Via your device (laptop, smartphone, tablet, etc.)
Click here for instructions on how to add your email address
Security option to enter your mobile number for password resets via text message
When you log in to your @myone.bm email account for the first time, you;ll be presented with the option to enter your mobile number so that you can receive password resets via text message.
This is not mandatory so if you don't want this option or don't have a mobile number, click Skip for now
To set up:
1. Choose Bermuda from the country drop down list
2. Enter your 10 digit mobile number
3. Click Save number
4. You'll receive a text message with an account verification code
5. Enter the account verification code then click Verify
Your New Home Page
Enjoy our user friendly email interface. Please scroll down to learn about the new features or click on the Table of Contacts to go directly to specific instructions.
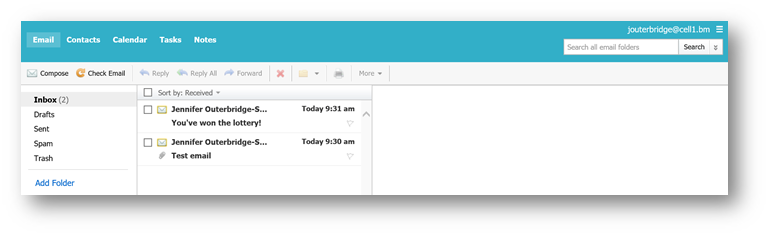
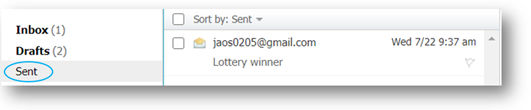
Read emails in your inbox
Simply click on the email message to open up the message.
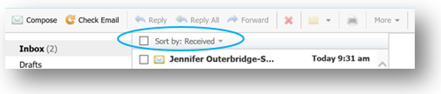
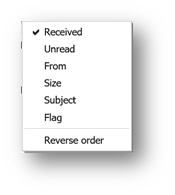
Sort
Click the Sort by drop down
menu arrow then the desired option for how you wish to sort your inbox.
Search all email
folders
Can't find an email?
Enter the recipient or sender name or subject of the email in the search bar in the upper right hand corner then click Search.
Add folders
If
you wish to organize your inbox into folders so that all emails on a subject or
from a specific sender are stored in one place:
1. Right
click on Inbox and choose Add Folder
2. Enter the name of your folder.
Click the drop down arrow to choose where you want the folder to live: Inbox, Sent, Spam, etc.
3. Click Save
Delete individual messages
1. From the left side menu, choose the location that you want to delete the message from: Inbox, Sent, etc.
2. Click the box next to
the message or the message itself then choose the X from top
Menu
3. Repeat for each message you want to delete.
Delete all messages
1. From the left side menu, choose the location where you want to delete all messages.
2. Tick the Sort box at the top to choose all messages in that location
3. Click the X in the top menu to delete all messages
Reply, Reply and Forward
Reply-Replies only to the sender
Reply to All-Replies to all recipients
Forward-Sends email to a new recipient(s)
1. Click on box next
to message or click message itself to open
2. Choose Reply, Reply All or Forward from the top Menu
Reply or Reply to All-Recipient information automatically populates. Click Send.
Forward-Enter the recipient email address and click Send
Send an Email
1. Choose Compose in the top Menu
2. Enter the
recipient email address in the To: field and
Subject
3. Type message
4. Click Send
Attach files to your outgoing message
1. Click Attach Files
2. Choose the file
from your computer
3. Click Send
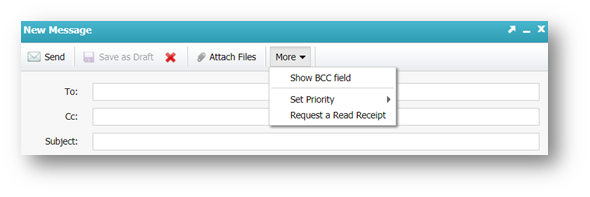
You will receive a
notification message in your inbox when the recipient has opened your email message.
1. Before sending
your message, click More in the top Menu.
2. Choose Read Receipt
Save email message as a draft
Use this if you are not
finished your message and/or would like to send it later.
Choose Save as Draft
in the top Menu

View Sent Messages
1. Click on Sent in the left side Menu
2. Click box next to
message or click on actual message to view
Trash Folder
All deleted messages go
to this folder.
Right click on Trash in the left menu
Trash Options
a) Filter into
“Trash”-Set up filtres to automatically send messages to Trash
b) Purge “Trash”-Empty
the Trash folder
c) Recover Deleted
Email-Recover emails deleted from Trash
Filter into “Trash
Use this to send trash to a folder or another email address.
Right click on Trash in the left menu
1. Name Filtre
2. Complete the Criteria
fields to filtre out emails from
specific senders or with a certain subject
or wording in the body of an email. You have the option to
Forward messages to another email address
as well.
Choose Delete Immediately if you don’t need to view these
filtred messages.
3. Click Save
Purge "Trash"
Use this to delete all messages in your Trash folder
Right click on Trash in the left menu
Once you click Purge “Trash”, a
confirmation box appears, just in case in you change your mind
Click OK to purge or Cancel
Recover deleted emails
You
can recover items you have deleted or purged from the Trash folder up to 14
days.
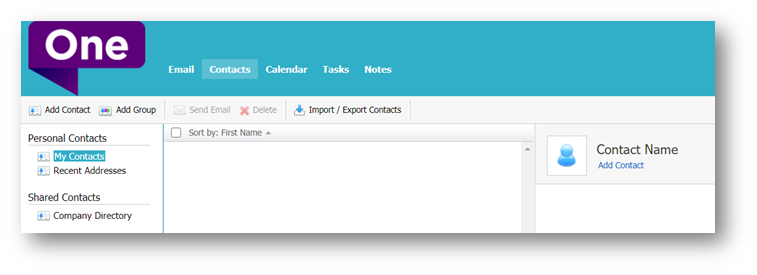
1. Click Add Contact/Remove or Add
Group/Remove
2. Complete the fields and
Click Save
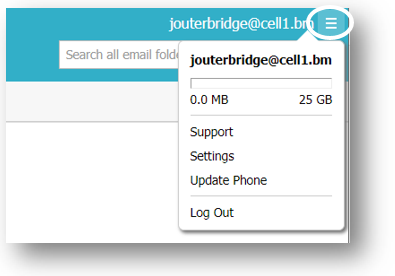
Click the horizontal bars icon in the top right hand corner to access the following:
· - See your inbox capacity and usage
· - Set up Spam settings
· -Update your mobile phone number (if
you have chosen this to receive password reset via text message)
· -Log Out
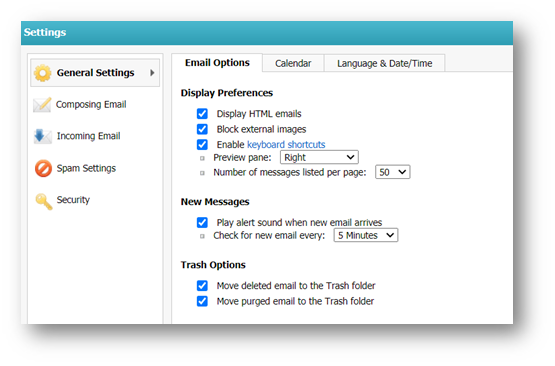
Settings-> General Settings
Display
Preferences, Calendar Settings, Language & Date/Time Settings
Settings-> Composing Email for your outgoing messages
Reply and forward citations, signature lines, etc.
Composing
Your outgoing email message settings are defaulted but
can be edited. Click Save after making
changes.
Add a signature line and choose
preferences then click Save
Settings->Incoming Email
Auto-Reply
Automatically send a message
to people when they send you an email.
Option to always turn
on or set for a specific time period
1. Settings->Incoming Email
2. Enter preferences then
click Save
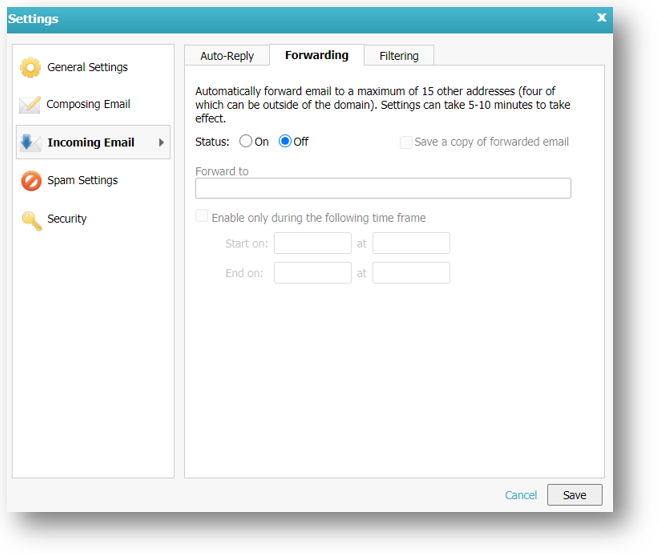
Forward your email to another address(es)
Option to always turn on or set for a specific
time period.
1. Settings->Incoming Email
2. Enter preferences then click
Save
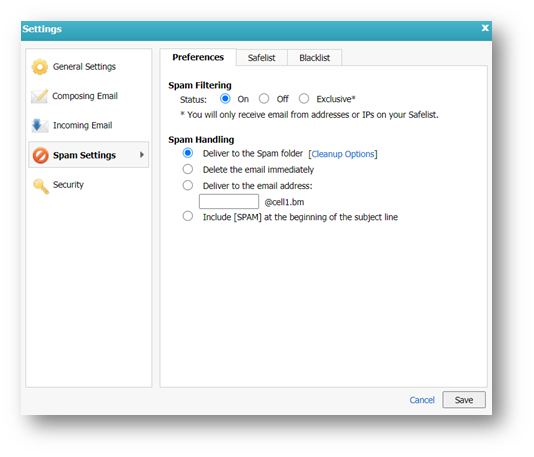
Find Spam Settings
Choose spam filtre preferences, add
email and IP addresses to a Safelist (allow) or Blacklist (block)
Settings->Spam Settings
Turn spam filtre on or off and set your spam filtre preferences
Settings->Spam Settings->Preferences tab
Click Save after making changes
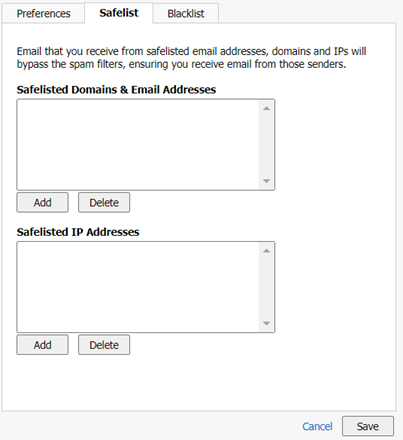
Safelist/Allow email addresses or IP addresses (previously called whitelist)
This is handy if emails from certain addresses are
ending up in your spam folder and you want them to be land in your inbox.
Settings->Spam Settings->Safelist
To Add email or IP addresess to your Safelist:
1. Click Add
and enter the email address or IP address . There is a category for each.
2.Click Save
To Remove email or IP Addresses from your Safelist
1. Click Delete
and choose the address or IP address you want to remove.
2. Click Save
Blacklist email or IP addresses
Add email or IP addresses that you
don’t want to receive messages from.
To Add:
Click Add
and enter the email address or
IP address under the category
Click Save
To Remove Blacklisted email or IP addresses:
Click Delete
and choose the address or
IP address you want to remove.
Click Save
Change your password and update your mobile number for password recovery via text message
The Change Password feature allows you to change your password if you know your current password.
Settings->Security
To change your current password:
1. Click
Change It Now
2. Enter
your new password following the password requirements provided
Your new password is rated as Weak,
Good or Strong. Your new password must be at least
Good to be accepted.
3. Enter
new password again in the Confirm field
4. Click Save
Your new password must meet the security requirements that will populate as you are typing.
Password Recovery
Update your mobile number for password
reset via text message.
1. Click Update Phone
2. Choose Bermuda from the country drop down
3. Enter your mobile number
4. Click Save number